Microsoft Entra ID Tenant Setup: Do It Right on Day One, Not in the Incident Review
A Microsoft Entra ID tenant takes about a day to set up properly and roughly three years to untangle if you rush it. Every new tenant starts with defaults built for getting started, not for keeping Dave from accounts out of trouble.
Leave them alone and you get the usual suspects: users registering apps, guests inviting more guests, a sign-in page with no logo, and one Global Administrator whose phone is the only way back in.
This guide is the day-one checklist I use on my own lab tenant. It covers creation, custom domains, branding, user, consent and guest settings, emergency access, authentication methods, security defaults versus Conditional Access, SSPR, PIM and logging, with every portal path checked against Microsoft Learn in October 2026.
Never miss a guide: subscribe here and check out my YouTube channel.
The short version (for anyone with a new tenant and a meeting in ten minutes)
- Verify your custom domain, fill in the tenant contacts and add branding before you invite anyone.
- Turn off user app registration, limit user consent and restrict who can invite guests.
- Create two passkey-protected emergency access accounts before you touch Conditional Access.
- Keep security defaults on until tested Conditional Access policies are ready to replace them.
- Enable passkeys and Microsoft Authenticator, then turn on SSPR and PIM where your licences allow.
- Send sign-in and audit logs somewhere that keeps them longer than 30 days.
In this guide
I walk through the tenant basics and branding in my video, if you would rather watch first.
What is a Microsoft Entra ID tenant?
A Microsoft Entra ID tenant is your organisation’s own instance of Microsoft Entra ID (formerly Azure AD). It holds your users, groups, devices, app registrations and policies, kept separate from everyone else’s.
You get one automatically when you sign up for Microsoft 365, Azure or Intune. Signing in to Teams really means signing in to your tenant, which then decides whether to let you in.
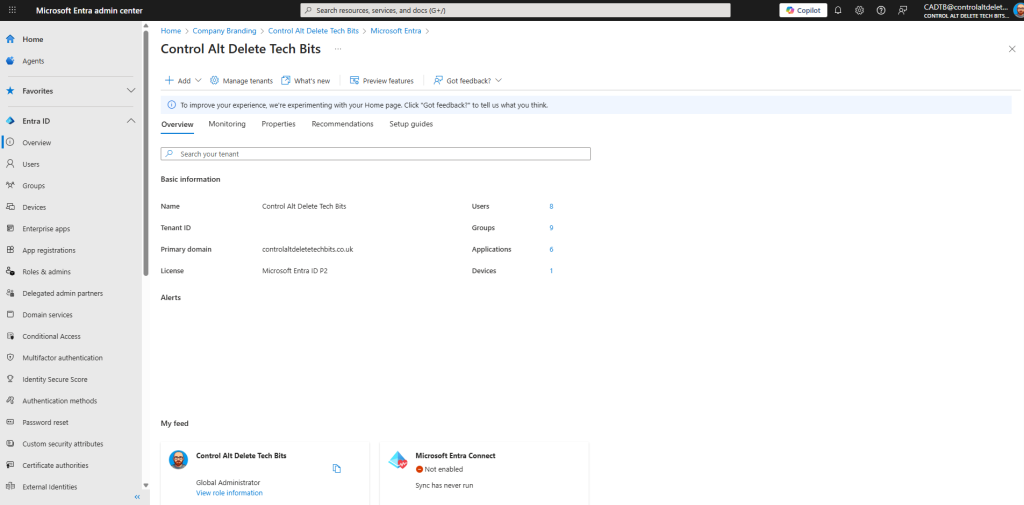
Day one matters because consent grants and guest invitations made before you tighten things stay put afterwards. The clean-up only grows.
Before you start: licences and prerequisites
| Feature | Entra ID Free | Entra ID P1 | Entra ID P2 |
|---|---|---|---|
| Security defaults | Yes | Yes | Yes |
| Company branding | With Business Standard or SharePoint (Plan 1) | Yes | Yes |
| SSPR for cloud users | Password change only | Yes | Yes |
| Conditional Access | No | Yes | Yes |
| Privileged Identity Management | No | No | Yes |
| Audit and sign-in log retention | 7 days | 30 days | 30 days |
Entra ID P1 comes with Microsoft 365 Business Premium and E3; P2 comes with Microsoft 365 E5. You need Global Administrator for the first pass, then step 11 shows how to stop living in it.
Good to know: the free Microsoft 365 E5 developer sandbox isn’t free for everyone any more. Eligibility is now limited to Visual Studio Professional or Enterprise subscribers, qualifying Microsoft partners and Premier or Unified Support customers.
Microsoft Entra ID tenant day-one checklist
Here is the whole day on one table. Print it and tick it off.
| Setting | Where | Recommended | Why |
|---|---|---|---|
| Custom domain | Microsoft 365 admin centre > Settings > Domains | Verified and default | Names users recognise |
| Tenant contacts | Entra ID > Overview > Properties | Shared mailbox, privacy URL | Microsoft and guests can reach you |
| Branding | Entra ID > Custom branding | Logo, background, help text | A familiar sign-in page |
| User settings | Entra ID > Users > User settings | No app registration or tenant creation | No surprise apps or tenants |
| User consent | Entra ID > Enterprise apps > Consent and permissions | Verified publishers, or none | Blocks consent phishing |
| Guest invitations | Entra ID > External Identities > External collaboration settings | Specific admin roles only | Guests can’t invite guests |
| Emergency access | Entra ID > Users | Two cloud-only accounts with passkeys | A way back in |
| Authentication methods | Entra ID > Authentication methods > Policies | Passkeys, Authenticator, TAP | Stronger sign-in |
| MFA baseline | Security defaults or Conditional Access | One of them, never neither | MFA for everyone |
| PIM | ID Governance > Privileged Identity Management | Eligible admin roles | No standing admin access |
| Logs | Entra ID > Monitoring & health > Diagnostic settings | Audit and sign-in logs to Log Analytics | Keep more than 30 days |
How to set up a Microsoft Entra ID tenant in 12 steps
Do these in order. Emergency access comes before Conditional Access for the same reason you check the parachute before the jump.
Step 1: Create the Microsoft Entra ID tenant
Most organisations get a tenant by buying Microsoft 365. You can also create one under Entra ID > Overview > Manage tenants > Create, though only paid customers can create extra workforce tenants.
- Choose a sensible organisation name. ‘Test Tenant Please Ignore’ will follow you onto every sign-in page.
- Pick the initial domain carefully. yourname.onmicrosoft.com can’t be edited or deleted later.
- Select the right country or region, because it decides where your directory data lives.
- Manage identity at entra.microsoft.com, the Microsoft Entra admin centre. admin.microsoft.com is the Microsoft 365 admin centre, a different place.
Step 2: Add and verify a custom domain
Nobody wants to sign in as dave@contoso4782.onmicrosoft.com. Add the domain through the Microsoft 365 admin centre, because it also builds the DNS records for Exchange Online and Teams.
- Go to Settings > Domains and select Add domain.
- Verify with Domain Connect if your registrar supports it, or add the TXT record by hand.
- Add DNS records for the services you use and set the domain as default.
- Sign in with a test user on the new domain before you change anyone’s UPN.
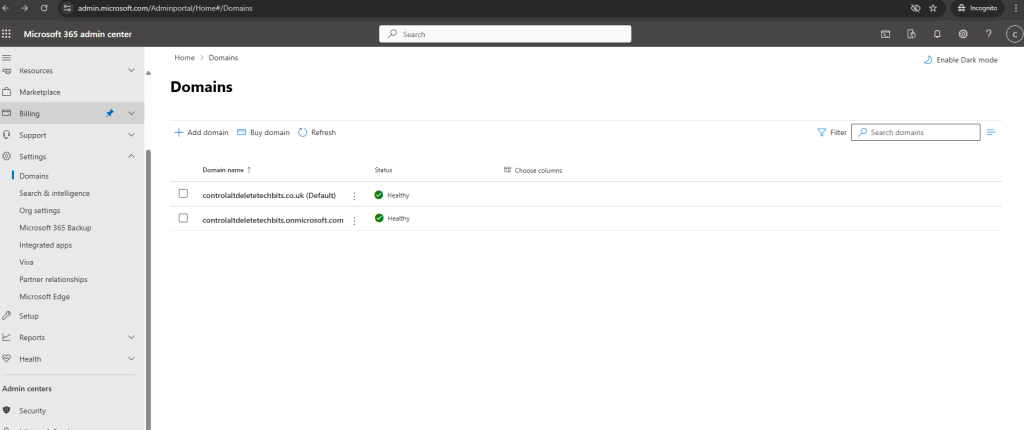
Tip: if email still runs elsewhere, don’t let the wizard add the MX record. Add the other records manually rather than rerouting everyone’s mail at 4:55pm on a Friday.
Step 3: Fill in tenant properties
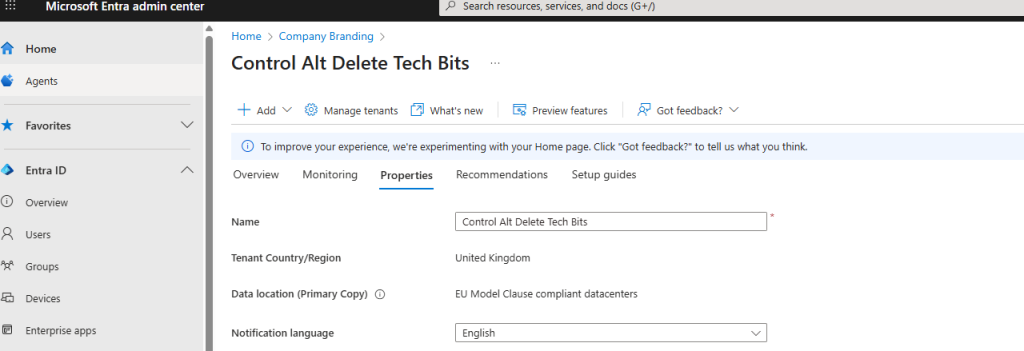
Go to Entra ID > Overview > Properties. Fix the organisation name, set the technical contact to a monitored shared mailbox, and add a global privacy contact and privacy statement URL. Guests see those, and step 7 needs them.
Step 4: Add company branding
Go to Entra ID > Custom branding and edit the Default sign-in experience. You need P1 or P2, Business Standard or SharePoint (Plan 1), plus the Organizational Branding Administrator role (Microsoft Learn).
| Element | Image size | Max file size |
|---|---|---|
| Favicon | 32 x 32 px | 5 KB |
| Background image | 1920 x 1080 px | 300 KB |
| Banner logo | 245 x 36 px | 50 KB |
| Square logo (light and dark) | 240 x 240 px | 50 KB |
Add a page background colour for slow connections and sign-in text telling users how to reach the service desk. Skip custom CSS, because Microsoft is retiring its layout and positioning properties.
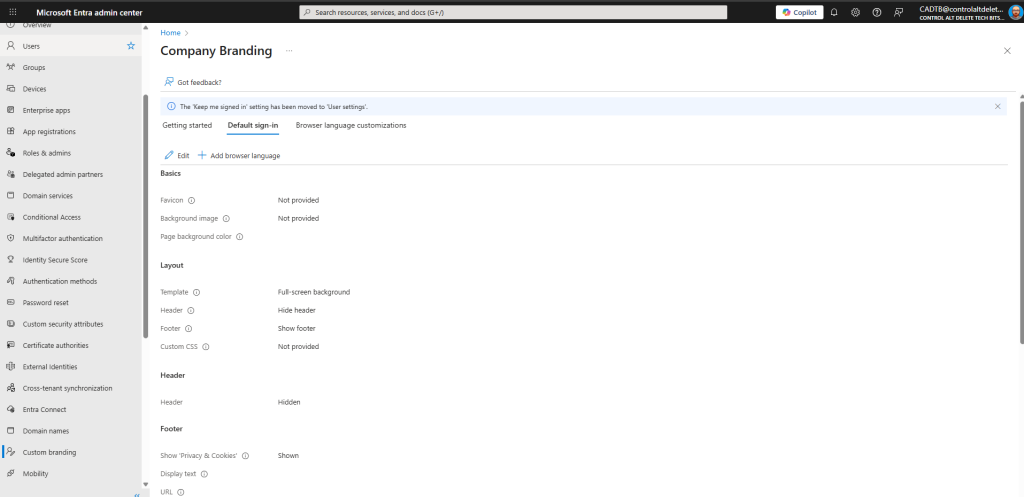
Gotcha: the banner logo is 245 x 36 pixels, not the 280 x 60 in older guides (including the first version of this one). Get it wrong and your logo looks like Windows 98 wallpaper set to stretch.
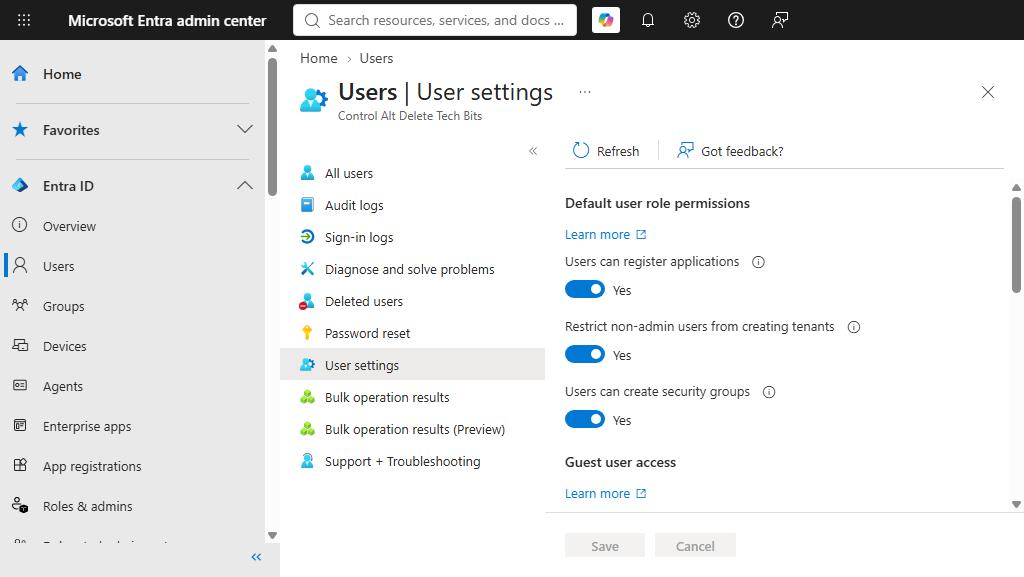
Step 5: Lock down user settings
Go to Entra ID > Users > User settings and change these before your users find them.
| Setting | Recommended |
|---|---|
| Users can register applications | No (use the Application Developer role instead) |
| Restrict non-admin users from creating tenants | Yes |
| Users can create security groups | No |
| Guest user access restrictions | Most restrictive |
Step 6: Control user consent to apps
User consent is how a phishing email becomes an app reading someone’s mailbox. Go to Entra ID > Enterprise apps > Consent and permissions > User consent settings and pick one of three options:
- Do not allow user consent: safest, but every request lands on an admin.
- Allow user consent for apps from verified publishers, for selected permissions (Recommended): a sensible middle ground.
- Allow user consent for apps: the old free-for-all. Don’t.
Then enable the admin consent workflow under Admin consent settings, so users can request apps instead of emailing screenshots. My guide to restricting app consent in Entra covers cleaning up old grants.
Step 7: Set guest and external collaboration rules
By default everyone, guests included, can invite external users. Go to Entra ID > External Identities > External collaboration settings:
- Guest invite settings: Only users assigned to specific admin roles can invite guest users.
- Collaboration restrictions: allow or block specific domains if you work with known partners.
- External user leave settings: let guests remove themselves once your privacy contact is set.
Step 8: Create emergency access accounts
Create at least two cloud-only accounts on your .onmicrosoft.com domain, assign Global Administrator as permanent active, and protect them with passkeys (FIDO2) or certificate-based authentication. Mandatory MFA applies to them too.
Exclude them only from Conditional Access policies that block or restrict sign-in, alert on every sign-in, and test every 90 days. The full walkthrough is in my break glass account guide.
Gotcha: the first version of this guide suggested long passwords with no MFA. Ignore it. A password-only emergency account can’t reach the admin centres it exists to rescue.
Step 9: Configure authentication methods and SSPR
Since 30 September 2025, methods are managed only in the Authentication methods policy. Go to Entra ID > Authentication methods > Policies and enable:
- Passkey (FIDO2), using passkey profiles for device-bound or synced passkeys (see my passkeys guide).
- Microsoft Authenticator, the everyday method for most users.
- Temporary Access Pass for onboarding and lost-phone days (my TAP guide).
Then go to Entra ID > Password reset > Properties and set SSPR to Selected for a pilot group, or All. Cloud SSPR needs Business Standard or higher, or P1 or P2 (licensing), and it doesn’t work on Microsoft 365 trials.
Step 10: Choose security defaults or Conditional Access
Every new Microsoft Entra ID tenant gets security defaults switched on, with a 24-hour grace period. They require MFA registration for everyone, MFA for admins every time, block legacy authentication and, for tenants created from 1 July 2026, block device code flow.
| Security defaults | Conditional Access | |
|---|---|---|
| Licence | Any, including Free | Entra ID P1 or P2 |
| Exclusions | None | Users, groups, locations, apps |
| Best for | Small tenants without P1 | Anyone with P1 and time to test |
You can’t run both. With P1, build policies in report-only, then switch security defaults off and the policies on in one change window. Add named locations first under Entra ID > Conditional Access > Named locations, marking office and VPN IP ranges as trusted.
Pick a naming convention now, because ‘New policy 7’ means nothing at 3am. CA001-AllUsers-AllApps-RequireMFA works. Test each policy with the Conditional Access What If tool, and review any Microsoft-managed policies, which switch on 30 days or more after appearing in report-only.
Step 11: Turn on PIM for admin roles
With P2 or Microsoft Entra ID Governance, go to ID Governance > Privileged Identity Management > Microsoft Entra roles and make admins eligible rather than permanently active. Emergency access accounts stay permanent active; see my Entra PIM guide.
No P2? At least split admin and everyday accounts, so your Global Administrator isn’t also the one reading phishing emails.
Step 12: Keep logs and watch service health
Entra ID keeps audit and sign-in logs for 7 days on Free and 30 days with P1 or P2, and upgrading doesn’t bring back lost days. Go to Entra ID > Monitoring & health > Diagnostic settings, add a setting, tick AuditLogs and SignInLogs, and send them to a Log Analytics workspace.
Then, in the Microsoft 365 admin centre, go to Health > Service health > Customize > Email and add up to two addresses. Turn on the Message center weekly digest under its Preferences too.
Prove your Microsoft Entra ID tenant setup worked
This read-only script uses the Microsoft Graph PowerShell SDK to report the key settings. It changes nothing, so it is safe on a Friday afternoon.
# Read-only check of day-one tenant settings
Connect-MgGraph -Scopes "Policy.Read.All","Directory.Read.All" -NoWelcome

Get-MgDomain | Select-Object Id, IsVerified, IsDefault

Get-MgPolicyIdentitySecurityDefaultEnforcementPolicy |
    Select-Object DisplayName, IsEnabled

$auth = Get-MgPolicyAuthorizationPolicy
$auth.DefaultUserRolePermissions |
    Select-Object AllowedToCreateApps, AllowedToCreateTenants, AllowedToCreateSecurityGroups
$auth | Select-Object AllowInvitesFrom
$auth.DefaultUserRolePermissions.PermissionGrantPoliciesAssigned

Get-MgIdentityConditionalAccessPolicy |
    Select-Object DisplayName, State | Sort-Object DisplayName

Disconnect-MgGraph
You want the three AllowedToCreate values False and AllowInvitesFrom set to adminsAndGuestInviters. For consent, microsoft-user-default-low means verified publishers only. Either security defaults should show True or you should see enabled Conditional Access policies; if neither, fix that first.
Then check the identity section of Secure Score at Entra ID > Identity Secure Score, and sign in as a test user in a private window to see your branding and the MFA registration prompt.
Microsoft Entra ID tenant gotchas
Wrong admin centre. Domains, licences and service health live at admin.microsoft.com; most identity settings live at entra.microsoft.com.
Retention isn’t retroactive. Moving from Free to P1 doesn’t bring back sign-in logs older than seven days.
Microsoft-managed policies. Exclude your emergency access group before they leave report-only; your exclusions survive Microsoft’s updates.
Device code flow. Security defaults in tenants created from 1 July 2026 block it, which can break shared devices and older scripts.
Changing UPNs later. Moving users off onmicrosoft.com after Teams, OneDrive and phones are set up is doable, but miserable. Verify the domain first.
Should you spend a day on your Microsoft Entra ID tenant?
Yes, ideally before your users arrive. Every setting here is cheap to change on day one and expensive on day 400, when hundreds of people depend on the old behaviour.
If you only do four things today: verify your domain, create two passkey-protected emergency accounts, close app registration and open consent, and make sure security defaults or Conditional Access covers everyone. Then put the kettle on.
Microsoft Entra ID tenant FAQs
What should I configure first in a new Microsoft Entra ID tenant?
Create two cloud-only emergency access accounts and verify your custom domain. Conditional Access and PIM are much safer once you have a reliable way back in.
Is the Microsoft 365 admin centre the same as the Microsoft Entra admin centre?
No. The Microsoft 365 admin centre (admin.microsoft.com) handles domains, licences, billing and service health. The Microsoft Entra admin centre (entra.microsoft.com) handles identity settings like Conditional Access and authentication methods.
Are security defaults on in a new Microsoft Entra ID tenant?
Yes. New tenants have security defaults enabled, with a 24-hour grace period before MFA is enforced. You turn them off when Conditional Access policies replace them.
What size is the Entra sign-in banner logo?
245 x 36 pixels, up to 50 KB. The background image is 1920 x 1080 pixels up to 300 KB, and square logos are 240 x 240 pixels.
Can I still get a free Microsoft 365 E5 developer tenant?
Only if you qualify, through a Visual Studio Professional or Enterprise subscription, a qualifying Microsoft partner programme, or a Premier or Unified Support contract.
How long does Microsoft Entra ID keep sign-in logs?
Seven days on Free and 30 days with P1 or P2. Use diagnostic settings to keep them longer in Log Analytics or a storage account.
Further reading
- Quickstart: Create a new tenant in Microsoft Entra ID (Microsoft Learn)
- Add your custom domain name to Microsoft Entra ID (Microsoft Learn)
- Security defaults in Microsoft Entra ID (Microsoft Learn)
- Microsoft Entra data retention (Microsoft Learn)
- Entra ID phishing-resistant MFA: a staged rollout
- Why use administrative units in Entra
- SC-300 exam study guide
Found this useful? Buy me a coffee, and if you handle subject access requests, have a look at Redact Ninja for redacting PDFs without sending files to a server.
Tags: Entra ID
[…] to try this in a lab first? My guide to setting up a Microsoft Entra ID tenant covers the groundwork, and a test tenant is a much better place to press Recover for the first […]