Why You Should Use Administrative Units to Delegate Entra Administration
Microsoft Entra Administrative Units are one of the most underrated tools in Entra ID. Many large tenants start with a handful of global admins managing everything, which works at first, but quickly becomes risky as the organisation grows. Suddenly, one global admin is approving resets for departments they’ve never heard of, and every minor change needs top-level rights.
That’s where Administrative Units (AUs) come in.
Never miss an article and subscribe, and don’t forget to check out my YouTube channel, Control Alt Delete Tech Bits
Administrative Units let you divide your Microsoft Entra ID tenant into logical sections, by department, site, or region and then delegate administration to people who only manage what they need. It’s one of the simplest ways to apply the principle of least privilege inside Entra ID.
What Administrative Units Do
Think of an AU as a security boundary within your tenant.
It groups users, groups, and devices together so that permissions and policies can apply only to that set.

Examples:
- HR staff manage only the “Human Resources AU”.
- IT support in Manchester reset passwords only for devices in the “North West AU”.
- External administrators manage guest users without touching internal accounts.
Without AUs, anyone with the “User Administrator” role can reset every password in the tenant. With AUs, that same role can be scoped to a specific department or location.
Why They Matter for Security
Least-privilege delegation isn’t just a Microsoft slogan, it’s a building block of good identity governance.
Using AUs:
- Reduces risk of accidental or malicious changes.
- Simplifies audits (you can prove who has control of what).
- Keeps helpdesk rights limited to the areas they support.
- Stops junior admins from seeing sensitive executive accounts.
For UK education or multi-academy environments, AUs are perfect for separating individual schools, year groups, or campuses while still using one Entra ID tenant
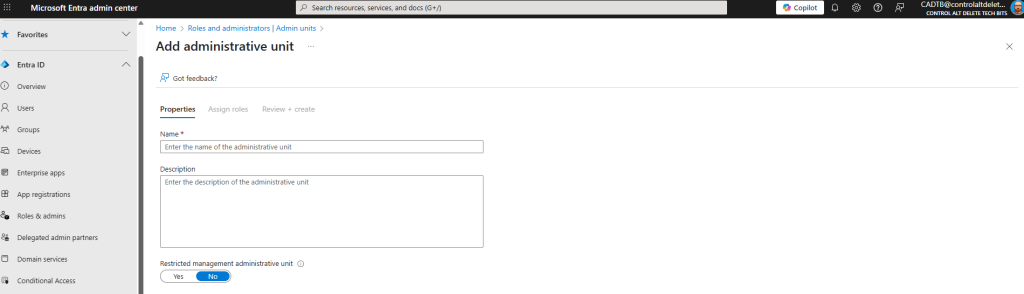
Creating an Administrative Unit
To create one:
- Sign in to https://entra.microsoft.com.
- Navigate to Entra ID > Role & admin > Administrative units.
- Select Add unit.
- Give it a meaningful name such as HR – London or Students – Sixth Form.
- Choose whether it will contain Users, Groups, Devices, or all three.
- Save it.
You’ve now got an empty AU next, add members.
Adding Members
- Open the AU you’ve just created.
- Select Members > Add members.
- Search for and select the users, groups, or devices you want included.
- Confirm by clicking Add.
Membership can be static (you add users manually) or dynamic (rules add them automatically based on attributes such as department or city).
Dynamic membership works best in larger tenants, for example:
(user.department -eq “Finance”)
automatically keeps the Finance AU current even as staff change roles.
Delegating Scoped Roles
Here’s where Administrative Units shine.
- Go to Entra > Roles & admins.
- Select the role you want to delegate, e.g. User Administrator or Helpdesk Administrator.
- Click Add assignments > Add scope.
- Under Scope, choose Administrative unit and pick the one you created earlier.
- Add the user or group who’ll hold that scoped role.
They now have that role only within the AU.
If they try to manage someone outside their scope, Entra ID blocks it.
Example use cases for Administrative Units
- Multi-school trust: Each school has its own AU; local IT staff can manage pupils and devices only for their site.
- Global company: Regional service desks manage users in their geography.
- Departmental control: HR can update job titles and reset passwords for their staff but not for Finance or IT.
All of this happens without creating separate tenants or complex Conditional Access rules
Combining AUs with Privileged Identity Management
For even tighter control, use Privileged Identity Management (PIM) to make AU-scoped roles eligible rather than permanent.
That way, regional admins activate their role only when needed and must justify it, keeping audit trails clean and rights time-limited.
- Open Entra > Identity Governance > PIM.
- Choose the role (e.g. User Administrator).
- Configure it as Eligible with approval required.
- Assign the AU-scoped admins.
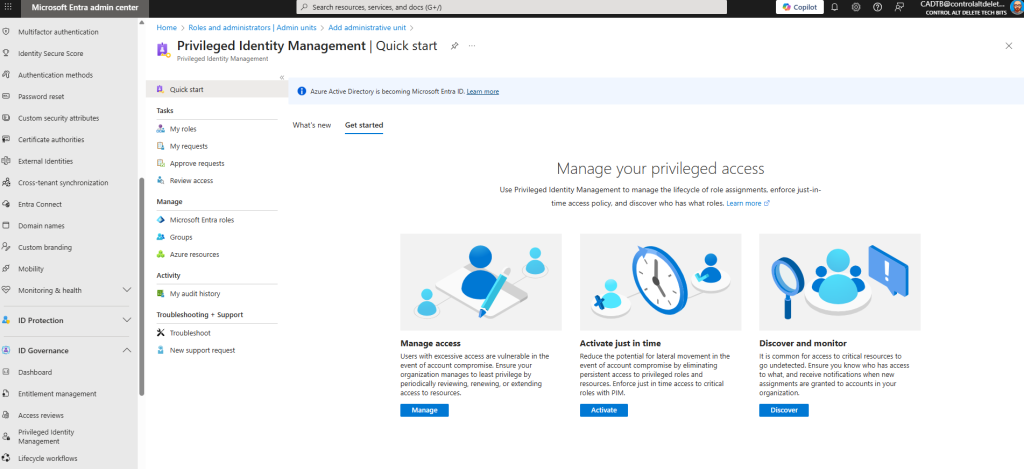
You’ve now combined least-privilege delegation with just-in-time elevation
Best Practices
- Name AUs consistently — e.g. Dept-Region or School-Campus.
- Use Dynamic Membership wherever possible.
- Keep Global Admin assignments to an absolute minimum.
- Review AU memberships quarterly.
- Document which roles are scoped to which units.
- Combine with Access Reviews for ongoing governance.
Administrative Units quietly solve one of Entra’s biggest headaches: safe delegation.
They keep your admins focused on the areas they actually manage, protect sensitive accounts, and help you meet least-privilege requirements without adding complexity.
If you’ve been running everything from a single Global Admin account, take half an hour to build a few AUs. You’ll gain structure, clarity, and peace of mind.
Check out this article Insider Threats in Office 365: A Practical Guide
Feel free to buy me a coffee to keep this website up and running
Tags: Entra ID
[…] Also, check out this article Why You Should Use Administrative Units to Delegate Entra Administration […]