Microsoft Entra ID (formerly Azure Active Directory) is the foundation of identity, access, and security in every Microsoft 365 environment. A poorly configured tenant can cause login issues, inconsistent branding, and security gaps that take days to fix.
Getting your Microsoft Entra tenant right from day one means fewer surprises down the line. This guide walks through how to set it up properly, using Microsoft Entra Admin Centre, configuring custom domains, applying company branding, and fine-tuning tenant-wide settings for a clean, secure start.
If you’ve worked with Microsoft 365 before, you’ll already know it needs an identity platform behind it. That’s where Microsoft Entra ID (previously known as Azure Active Directory) fits in.
Your Entra tenant is your organisation’s identity hub. A space that contains all users, groups, and applications. It separates your company’s data from everyone else’s, while providing authentication and access controls for everything from Teams and SharePoint to Intune and Defender.
When people talk about “signing into Microsoft 365,” they’re really signing into Entra ID. It’s the invisible glue that ties your devices, apps, and permissions together.
Pick the Right Tenant Type Before You Begin
When setting up your Microsoft 365 tenant, you’ll be asked to choose a plan. The plan determines which Entra ID features you can use.
Tenant Type
Ideal For
Microsoft 365 Business
Small to mid-sized organisations (up to 300 users).
Microsoft 365 Enterprise (E3/E5)
Large environments needing full security, compliance, and automation.
Microsoft 365 Education (A1/A3/A5)
Schools and colleges, integrating with Intune for Education.
Microsoft 365 Government (GCC)
US government organisations and contractors.
For most testing or training scenarios, especially if you’re studying for the SC-300 exam or similar, the Microsoft 365 E5 Developer Tenant is the best option. It’s free, renewable, and includes Microsoft Entra ID P2, giving you access to advanced features such as Conditional Access, Identity Protection, and Privileged Identity Management.
When naming your tenant, keep it professional. A name like techbitslab.onmicrosoft.com works better than something personal. You’ll see that name often in Microsoft Entra Admin Center, so it’s worth choosing carefully.
How to Set Up Your Microsoft Entra Tenant the Right Way
Create Your Tenant in Microsoft 365
Here’s the basic process for provisioning your tenant:
Your tenant is now provisioned. It’s blank for now — think of it as a secure shell waiting to be configured.
Add and Verify a Custom Domain
You could stick with the default .onmicrosoft.com domain, but it looks unprofessional and confuses users. Adding your own domain (for example, @controlaltdeletetechbits.co.uk) gives a trusted, branded sign-in.
To add a domain in Microsoft Entra Admin Centre:
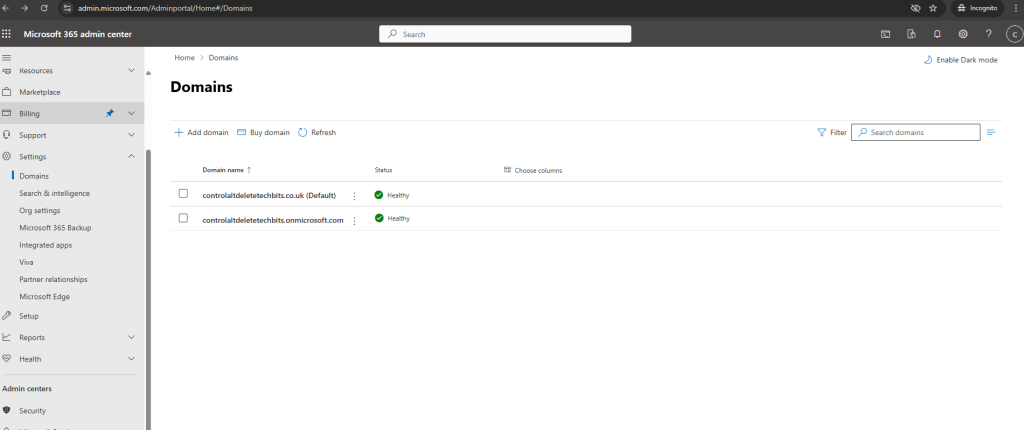
Go to Settings > Domains in the Microsoft 365 admin portal.
Choose Add domain and enter your custom domain name.
Microsoft will provide a TXT record to verify ownership. Either:
Sign in to your registrar through Domain Connect, or
Add the TXT record manually in your DNS zone.
Once verified, select Add DNS records automatically so Microsoft can configure mail, Teams, and Intune entries.
Set your new domain as the default and create a test user to confirm sign-in works.
If you’re using an on-premises mail system, skip automatic MX record configuration and update those manually to avoid routing conflicts.
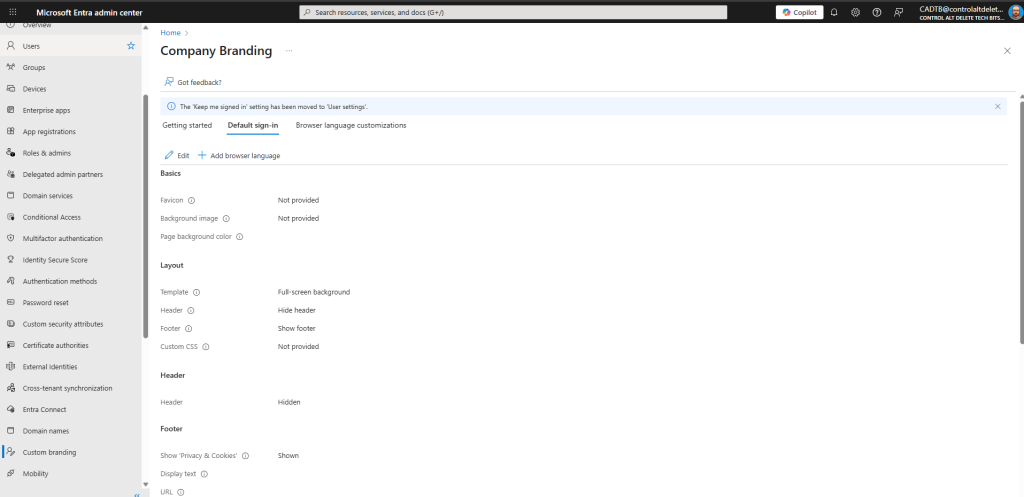
Customise Sign-In Branding
Branding your sign-in pages in Entra Microsoft builds trust and reduces phishing risk. Users are more confident entering their credentials when the page looks familiar.
Choose a consistent colour theme, for instance, Control Alt Delete Tech Bits uses #007FFF.
Add contact details and a short support message so users know how to reach IT if they’re locked out.
Microsoft Entra ID
You can also create multiple branding profiles, ideal if your company runs several domains or operates in different regions.
Configure Tenant-Wide Settings
Once your branding looks right, it’s time to review the settings that control how your Microsoft Entra tenant behaves across the board.
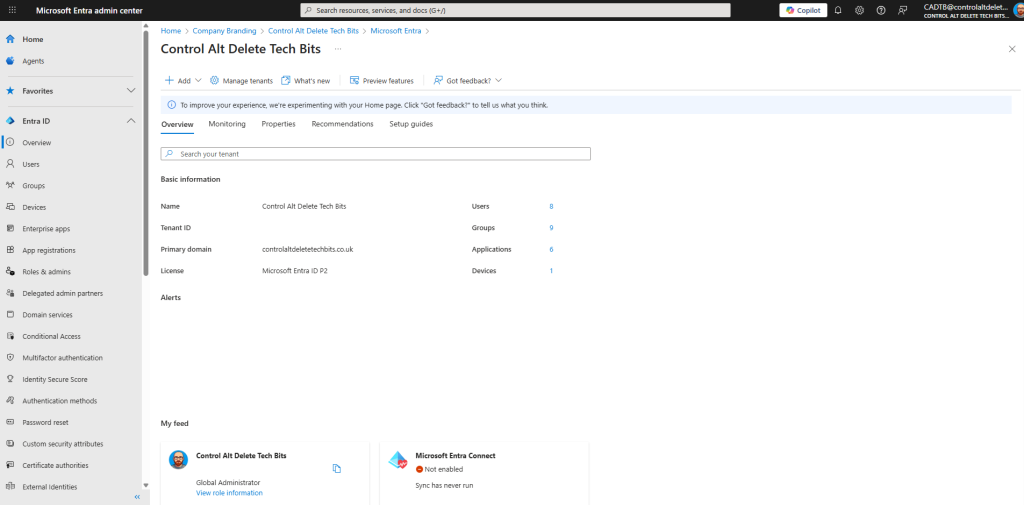
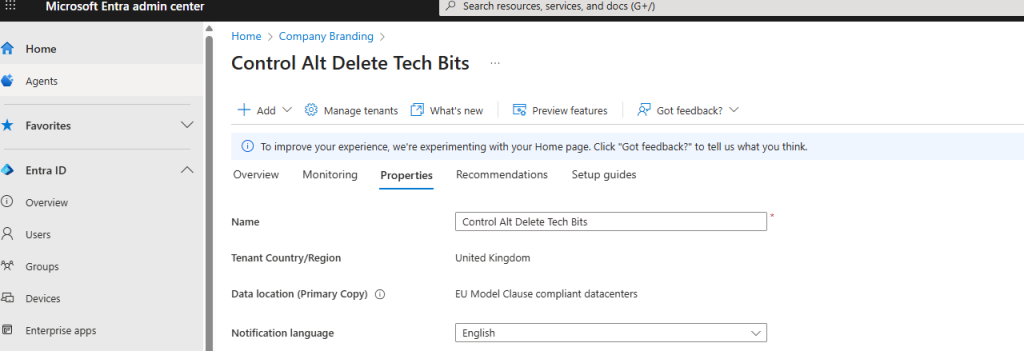
a) Tenant properties Under Entra ID > Overview > Properties, review:
Organisation name and region
Technical and privacy contact emails
Whether Security defaults are enabled (many admins disable these once Conditional Access is in place)
App consent settings — restrict app registration to admins or trusted developers
Entra ID
b) User settings Go to Identity > User settings and:
Turn off “Users can register applications” unless necessary.
Disable self-service purchases if you want licensing controlled centrally.
Review External collaboration settings for guest user behaviour.
c) Notifications and service health In Microsoft 365 Admin Centre, navigate to Org settings > Service health. Make sure alerts go to a monitored shared mailbox so downtime notifications aren’t missed.
Strengthen Baseline Security
Before diving into advanced Conditional Access, get the basics right:
Enable Multi-Factor Authentication (MFA) for administrators and critical accounts first.
Turn on Self-Service Password Reset (SSPR) — it saves countless helpdesk requests.
Activate Microsoft Entra ID Protection (part of P2 licensing) to detect and mitigate risky sign-ins automatically.
And finally, maintain two break-glass (Article on how to set these up) accounts with long, random passwords stored securely offline. They must be exempt from Conditional Access policies but closely monitored.
Ongoing Maintenance and Good Habits
Once your tenant is configured:
Record all configuration changes and keep them versioned.
Add at least one backup Global Administrator.
Export your settings regularly using PowerShell or the Graph API.
Review your Microsoft Secure Score and Identity Secure Score to track improvement.
Start piloting Conditional Access and Privileged Identity Management (PIM) with a small admin group before rolling out tenant-wide.
A properly configured Microsoft Entra ID tenant forms the foundation of every secure Microsoft 365 deployment. It controls who can access what, under which conditions, and from which devices. Skipping setup steps or leaving defaults unchanged often leads to weak points that attackers can exploit
Whether you’re running a production environment or learning for certification, take time to configure Entra ID with care. Once the tenant is in good shape, you’ll find that managing Conditional Access, compliance, and hybrid identities becomes far easier, and your users will thank you for a smoother, more reliable sign-in experience.
To provide the best experiences, we use technologies like cookies to store and/or access device information. Consenting to these technologies will allow us to process data such as browsing behaviour or unique IDs on this site. Not consenting or withdrawing consent, may adversely affect certain features and functions.
Functional
Always active
The technical storage or access is strictly necessary for the legitimate purpose of enabling the use of a specific service explicitly requested by the subscriber or user, or for the sole purpose of carrying out the transmission of a communication over an electronic communications network.
Preferences
The technical storage or access is necessary for the legitimate purpose of storing preferences that are not requested by the subscriber or user.
Statistics
The technical storage or access that is used exclusively for statistical purposes.The technical storage or access that is used exclusively for anonymous statistical purposes. Without a subpoena, voluntary compliance on the part of your Internet Service Provider, or additional records from a third party, information stored or retrieved for this purpose alone cannot usually be used to identify you.
Marketing
The technical storage or access is required to create user profiles to send advertising, or to track the user on a website or across several websites for similar marketing purposes.